

Table of Contents
- Why Typing Causes Wrist Pain and What You Can Do About It
- Step 1: Use Cold Compression Therapy for Wrists to Reduce Inflammation
- Step 2: Set Up an Ergonomic Keyboard Setup to Fix Your Posture
- Step 3: Perform Wrist Stretches for Office Workers Throughout the Day
- Step 4: Adjust Your Mouse Grip and Typing Technique
- Step 5: Take Micro-Breaks and Use Software Reminders
- When to See a Doctor for Wrist Pain
- Conclusion: Your Path to Pain-Free Typing
- Frequently Asked Questions
Last Updated: September 4, 2026
Why Typing Causes Wrist Pain and What You Can Do About It
Wrist pain from typing usually stems from hours of maintaining a poor wrist position. When your wrists are bent, extended, or resting on hard surfaces for long periods, the tendons and nerves in the carpal tunnel become compressed (the CDC). This repetitive strain injury triggers inflammation that, left untreated, can develop into chronic conditions like carpal tunnel syndrome or tendonitis. At Penguin Fingers, we help thousands of Americans manage this exact problem.

The core of treating wrist pain is interrupting the cycle of strain and inflammation before it becomes permanent damage. This guide covers seven practical steps you can start today.
Step 1: Use Cold Compression Therapy for Wrists to Reduce Inflammation
Cold compression therapy for wrists is the fastest way to bring down swelling and numb acute pain after a long typing session. Applying cold within the first few hours of discomfort constricts blood vessels, which limits fluid buildup in inflamed tissues. Unlike a plain ice pack, compression wraps hold the cold gel firmly against the wrist, which also stabilizes the joint and prevents further strain while you work.
The Penguin Fingers Wrist Cold Compression Pack delivers both cooling and compression in a wearable design, so you can continue moving while treating the injury. The gel pack conforms to the natural curve of your wrist, targeting the area where nerve compression occurs. Apply it for 15 to 20 minutes, then remove it for at least 40 minutes to avoid skin irritation (peer-reviewed research). Repeat this cycle two to three times during your workday, especially after prolonged typing blocks.
Step 2: Set Up an Ergonomic Keyboard Setup to Fix Your Posture
An ergonomic keyboard setup is not about buying an expensive split keyboard; it is about positioning your forearms so your wrists stay in a neutral position. A neutral wrist position means your hand aligns with your forearm, with no upward or downward bend. When your keyboard sits too high, you force your wrists into extension, which narrows the carpal tunnel and compresses the median nerve.
Calculate Your Ideal Desk and Chair Height
To achieve this neutral position, you need your keyboard at the correct height relative to your body. A common formula used by ergonomists is to start with your seated elbow height. Sit with your shoulders relaxed and your upper arms hanging naturally at your sides. Bend your elbows to a 90-degree angle. Measure the distance from the floor to the underside of your elbow. This measurement is your ideal seated elbow height.
Your desk surface should be approximately 1 to 2 inches below this elbow height to allow for the thickness of the keyboard and any wrist support. If your desk is not adjustable, use an under-desk keyboard tray to bring the typing surface to the correct level. A fixed desk that is too high forces you to either raise your chair, which lifts your feet off the floor, or to shrug your shoulders, which creates tension in your neck and upper back. If you must raise your chair to meet the desk, use a footrest to keep your feet flat and your hips at a slightly open angle (about 100-110 degrees) relative to your torso.
Keyboard Hardware: Switches and Layout Matter
Beyond positioning, the hardware itself plays a significant role in wrist strain. Most office keyboards use rubber dome (membrane) switches, which require you to press the key all the way to the bottom (a process called 'bottoming out') to register a keystroke. This constant impact travels up your fingers and into your wrist tendons.
Mechanical keyboards offer a distinct advantage here. Switches like Cherry MX Red or Brown have a lower actuation force (around 45-55 grams) and register the keystroke halfway through the press (edu). This means you do not need to bottom out, reducing the impact force on your joints. For typists who want the lightest possible touch, low-force switches like Kailh Choc Red (around 50 grams) or even optical switches with a 35-gram actuation force can be beneficial.
Another hardware consideration is the keyboard layout. A standard, full-size keyboard forces your shoulders to roll inward and your wrists to angle outward to reach the mouse. A tenkeyless (TKL) layout, which removes the number pad, brings the mouse closer to your body's centerline, reducing shoulder strain. For more severe wrist pain, a split ergonomic keyboard like the Kinesis Freestyle Pro or the ErgoDox EZ allows you to rotate each half outward, keeping your wrists straight and your shoulders relaxed. These are not gimmicks; they are tools that physically prevent the ulnar deviation that contributes to wrist pain.
Step 3: Perform Wrist Stretches for Office Workers Throughout the Day
Wrist stretches for office workers should target both the flexor and extensor muscles, and they work best when performed every hour rather than in one long session. Stretching keeps the tendons gliding smoothly through the sheath and prevents them from becoming tight and irritated. Before stretching, ensure your wrists are warm; cold tissues are more prone to micro-tears. treat digital eye strain.
Try this three-minute routine at your desk:
- Extend your right arm with your palm facing up, then gently pull your fingers down toward the floor with your left hand. Hold for 30 seconds, feeling the stretch along your forearm.
- Flip your palm to face down and repeat the same pull. Hold for 30 seconds.
- Make a loose fist and circle your wrist clockwise ten times, then counterclockwise ten times to improve range of motion.
- Interlace your fingers in front of you and push your palms away from your body, rounding your upper back. Hold for 20 seconds.
These movements address wrist extension, wrist flexion, and ulnar deviation, which are the three planes of motion that typing stresses most. Performing them consistently reduces stiffness and improves blood flow to the affected tendons.
Step 4: Adjust Your Mouse Grip and Typing Technique
Your mouse hand often hurts more than your typing hand because the grip forces your wrist into awkward angles. A proper mouse grip uses your whole arm, not just your wrist. Move the mouse from your shoulder and elbow, keeping your wrist straight and your hand relaxed. Avoid pinching the mouse tightly; a death grip transmits tension through the tendons and into the carpal tunnel.
Position the mouse close to your keyboard so you do not reach forward, which extends your wrist. Your forearm should rest on the desk surface for support, and your hand should hover lightly over the mouse buttons. If you experience radial deviation or ulnar deviation while mousing, consider a vertical mouse that places your hand in a handshake position. For typing technique, use a light touch on the keys and let your fingers return to the home row naturally. Do not pound the keys or hold them down longer than necessary.
Step 5: Take Micro-Breaks and Use Software Reminders
Micro-breaks are short pauses taken every 20 to 30 minutes that give your muscles and tendons time to recover from sustained contraction. Sustained typing without breaks keeps the forearm muscles in a constant state of tension, which restricts blood flow and accelerates fatigue. A micro-break of just 60 to 90 seconds, taken every half hour, can significantly reduce accumulated strain across an eight-hour workday.
The challenge is remembering to take them, which is where software reminders help. Applications like Stretchly, Workrave, or even a simple recurring calendar alert can prompt you to stand, stretch, and shake out your hands. During your break, stand up, roll your shoulders, and perform the wrist stretches from Step 3. This pattern of work and recovery mimics the training principles used in physical therapy and prevents the onset of work-related musculoskeletal disorders.
Software That Forces You to Stop
While calendar alerts are easy to ignore, dedicated break-reminder apps are designed to interrupt your flow. Here are some options for office workers:
- Stretchly (Free, Windows/macOS/Linux): This app runs in your system tray and displays a full-screen overlay every 10 minutes for a 20-second micro-break, and every 30 minutes for a 5-minute break. You can customize the intervals and the break content. The full-screen overlay is harder to dismiss than a simple notification, which makes it effective.
- Workrave (Free, Windows/Linux): A long-standing open-source tool that uses a gradual escalation of reminders. It starts with a small notification, then a pop-up window, and finally locks your keyboard and mouse if you ignore the prompts. This 'enforced' break is useful for people who lose track of time.
- Time Out (macOS, $4.99 one-time purchase): This app integrates cleanly with macOS and allows you to set separate intervals for short and long breaks. It also has a 'flexible' mode that uses your keyboard and mouse activity to determine when you are actually typing versus just reading, so you only get breaks when you need them.
- RSI Guard (Windows, $29.95): This tool is more advanced, offering not just break reminders but also exercises and statistics on your typing speed and rest patterns. It can track your 'RSI risk level' based on your work habits.
The Psychological Dimension: Breaking the Stress-Tension Cycle
Most advice on micro-breaks focuses on the physical, but there is a significant psychological component that exacerbates wrist pain. When you are under deadline pressure, your body releases cortisol and adrenaline. This 'stress response' increases muscle tension throughout your body, including in your forearms and shoulders. You may not notice it, but you are likely gripping the mouse harder and tensing your shoulders when you are stressed. This sustained tension restricts blood flow to the tendons and amplifies the mechanical strain of typing.
This creates a vicious cycle: pain causes stress, stress increases tension, and tension worsens the pain. Taking a micro-break is not just about resting your tendons; it is about interrupting this stress response. A 60-second break where you consciously drop your shoulders, unclench your jaw, and take three slow, deep breaths can lower your heart rate and reduce systemic muscle tension. This is why the most effective break routines combine physical movement with a brief mental reset.
A practical technique is the '2-2-2' rule during your micro-break: 2 seconds to look away from your screen (to rest your eyes), 2 seconds to roll your shoulders back and down, and 2 seconds to stretch your fingers open wide. This simple sequence, repeated a few times, addresses both the physical and psychological components of strain.
When to See a Doctor for Wrist Pain
You should see a doctor if your wrist pain persists for more than two weeks despite consistent home treatment, or if you experience numbness, tingling, or weakness in your fingers. These symptoms can indicate nerve compression that requires professional diagnosis. Sudden, severe pain, or pain that follows a specific injury, also warrants immediate medical attention.
A physician can distinguish between tendonitis, carpal tunnel syndrome, and other conditions that require different treatments. They may recommend physical therapy, prescribe anti-inflammatory medication, or in severe cases, suggest a splint to immobilize the joint overnight. If your work involves repetitive typing, ask about workplace accommodations under the Americans with Disabilities Act, which may include ergonomic equipment assessments.
| Symptom | Likely Cause | Recommended Action |
|---|---|---|
| Dull ache after long typing sessions | Overuse strain | Cold therapy, stretching, micro-breaks |
| Numbness or tingling in thumb and index finger | Nerve compression | See a doctor for evaluation |
| Sharp pain with wrist movement | Possible tendonitis | Rest, cold therapy, medical assessment |
| Weakness when gripping objects | Advanced nerve involvement | Urgent medical consultation |
Conclusion: Your Path to Pain-Free Typing
Treating wrist pain from typing requires addressing both the inflammation and the habits that cause it. Start with cold compression therapy for wrists to reduce acute swelling, then correct your ergonomic keyboard setup and practice regular wrist stretches for office workers throughout the day. Consistency is the key; a few minutes of prevention each hour outperforms occasional intensive treatment. Penguin Fingers offers wearable cold compression sleeves designed specifically for wrist pain, with dual hot and cold therapy options to support your recovery before, during, and after work. Get started with Penguin Fingers and give your wrists the support they need to keep you typing comfortably.
Frequently Asked Questions
How long does it take for an overused wrist to heal?
Mild wrist pain from typing often improves within 1 to 2 weeks if you address the cause early. Start by reducing inflammation with cold compression therapy for wrists for 15 minutes at a time. Combine this with regular stretching and an ergonomic keyboard setup. If you have sharp pain, numbness, or weakness that lasts more than two weeks, see a doctor for a proper diagnosis.
Should I wear a wrist brace while typing?
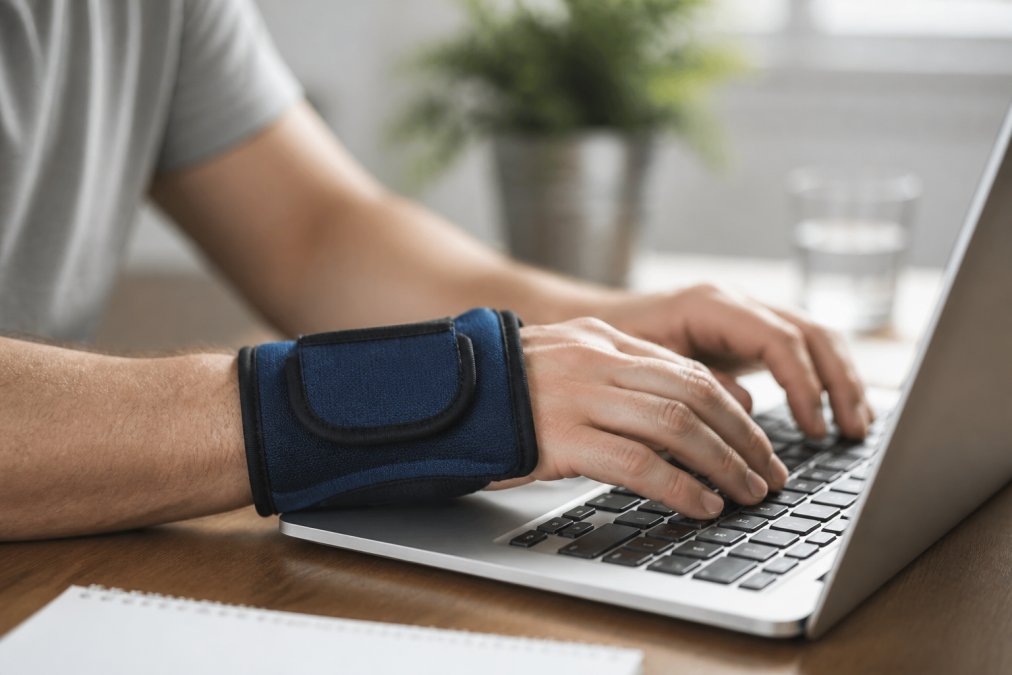
A wrist brace can help, but not all day. Wear it at night to keep your wrist in a neutral position while you sleep. During typing, a brace may restrict movement and cause you to compensate with your fingers. Focus on a neutral wrist position with your ergonomic keyboard setup instead. Use cold compression for acute flare-ups during the day.
Are cold compression sleeves effective for typing-related wrist pain?
Yes. Cold compression therapy reduces inflammation and numbs the area, which helps with the acute pain from overuse. The compression also limits swelling and provides support. Apply a cold compression sleeve for 15 to 20 minutes after work or when your wrist feels sore. Do not sleep with the cold pack on, and always keep a cloth between the pack and your skin.
This article was written using GrandRanker


