

Table of Contents
- What Wrist Tendonitis Is and Why Cold Therapy Works
- What You'll Need Before You Start Icing
- Step-by-Step: How to Apply Cold Therapy to Your Wrist
- How Long to Ice Wrist Tendonitis (and How Often)
- When to Use Heat vs Ice for Tendonitis
- Cold Compression Therapy for Wrist Pain: DIY vs. Commercial Wraps
- Contraindications and Skin Protection Protocols
- Common Mistakes to Avoid and When to See a Doctor
- Frequently Asked Questions
Last Updated: October 3, 2026
What Wrist Tendonitis Is and Why Cold Therapy Works
Wrist tendonitis is inflammation of the tendons that connect your forearm muscles to the bones in your wrist, causing pain, swelling, and stiffness that worsens with movement. We build wearable cold compression sleeves for exactly this kind of joint pain, and this guide walks you through icing your wrist the right way.

The tendons in your wrist take a beating. Typing, lifting, gripping, and repetitive motion all tug on the same tissue. When that tissue gets irritated, it swells. The swelling presses on nearby nerves, and that is when the ache turns sharp.
Cold helps in three ways:
- Vasoconstriction narrows blood flow to the area, which limits swelling
- The analgesic effect numbs nerve endings so pain fades
- Slowed tissue activity gives the tendon a chance to settle down
The American Academy of Orthopaedic Surgeons on tendon injuries explains that most tendonitis cases improve with rest, ice, and activity changes rather than surgery.
Symptoms That Respond Best to Cold
Cold works best on fresh flares, not old, stiff joints. Reach for ice when you notice:
- Sharp pain during or right after activity
- Visible puffiness around the wrist
- Warmth or redness over the tendon
Stiffness without swelling usually responds better to heat. We cover that split later.
What You'll Need Before You Start Icing
Gather your supplies first so you are not hopping up mid-session. Here is the short list:
- A cold pack or gel wrap that conforms to the wrist
- A thin cloth or towel for skin protection
- An elastic bandage for light compression
A flexible gel wrap beats a bag of frozen peas. Hard packs do not bend around the wrist, so they cool unevenly. A wearable sleeve stays put and covers the joint from all sides.
Step-by-Step: How to Apply Cold Therapy to Your Wrist
You can ice a sore wrist in about 15 minutes. Follow these three steps and you will hit the right spots without damaging your skin.
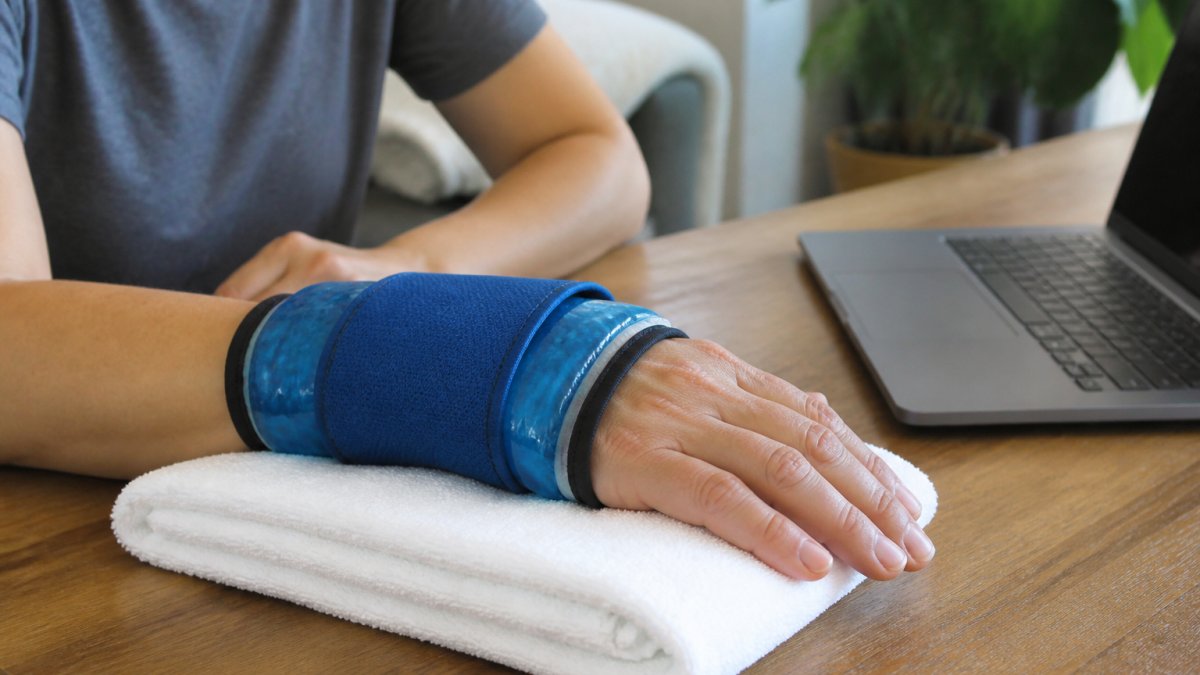
Step 1: Prep and Protect Your Skin
Wrap the cold pack in a thin cloth before it touches your skin. Direct contact with a frozen pack can cause frostbite or a red, itchy rash. A single layer of cotton is enough.
Check your skin before you start. Skip icing on any cut, rash, or numb patch. If you have poor circulation or nerve damage, talk to your doctor first.
Step 2: Apply the Cold Pack and Compress
Place the pack over the sore part of the wrist, not just the top. The tendon runs along the whole joint, so cover both sides. Then wrap the elastic bandage over the pack.
Keep the bandage snug but not tight. You should still be able to slip a finger under it. Too much pressure can cut off blood flow and make things worse.
Step 3: Elevate and Time the Session
Rest your wrist above the level of your heart. Prop it on a pillow while you sit. Elevation helps fluid drain away from the joint, which eases swelling.
Set a timer for 15 minutes. Do not leave the pack on longer, even if it feels good. Cold that stays too long can harm tissue instead of helping it.
How Long to Ice Wrist Tendonitis (and How Often)
Ice your wrist for 15 to 20 minutes at a time, then wait at least an hour before the next session. For how long to ice wrist tendonitis, the timer matters more than the temperature.
Here is a simple schedule to follow:
| Phase | Session Length | Frequency | When to Stop |
|---|---|---|---|
| First 48 hours of a flare | 15-20 minutes | Every 2-3 hours | Once pain eases |
| Days 3-7 | 15 minutes | 3-4 times daily | When swelling drops |
| Ongoing soreness | 10-15 minutes | After activity | When you no longer need it |
Stop icing once the swelling is gone and the wrist moves without pain. Cold is a tool for the angry phase, not a daily habit forever.
When to Use Heat vs Ice for Tendonitis
Use ice for fresh swelling and heat for old stiffness. That one line answers most of the "when to use heat vs ice for tendonitis" question, but the reasoning behind it matters if you want to pick the right tool on a given morning.
Cold and heat push blood vessels in opposite directions. Cold narrows them (vasoconstriction), which limits the fluid that pools around an irritated tendon and slows the inflammatory cycle.
Match the tool to the moment:
Penguin Fingers Wrist Cold Compression Pack →
- Ice for sharp pain, visible swelling, warmth over the tendon, or right after activity
- Heat for morning stiffness, dull nagging aches, and a joint that feels tight but is not puffy
- Heat before activity to loosen the wrist, ice after to calm whatever the activity stirred up
A Simple Contrast-Bath Protocol
Contrast therapy is the one method that uses both. A common pattern is three to four cycles of warm water (about 3 minutes) followed by cool water (about 1 minute), ending on cool. Most practitioners find this useful for stubborn cases that are past the acute swelling stage but still ache. Skip it during the first 48 hours of a fresh flare, when cold alone is the safer call.
Timing Rules That Actually Matter
- Never apply heat to a wrist that is swollen, red, or warm to the touch, heat feeds inflammation
- Never apply heat to an area that is still numb from a recent cold session
- Wait at least an hour after icing before you apply heat, and vice versa
A dual hot and cold sleeve can be warmed in the microwave or chilled in the freezer, then worn as the same wrap. That matters for tendonitis because the same wrist often needs cold in the evening and heat the next morning, a single wrap that does both keeps you from guessing which drawer the ice pack ended up in.

Cold Compression Therapy for Wrist Pain: DIY vs. Commercial Wraps
Cold compression therapy for wrist pain pairs cooling with steady pressure, and the wrap you choose decides how well it works. Most guides either sell you a product or tell you to grab a bag of peas. Here is the honest comparison neither camp gives you.
DIY Options and Where They Fall Short
- A bag of frozen vegetables wrapped in a towel, cheap, but it thaws in about 10 minutes, drips condensation, and does not bend around the wrist
- A zip bag of ice cubes with a cloth barrier, colder than peas, but lumpy and prone to leaking
- A wet washcloth frozen flat, then bandaged on, conforms well, but loses its chill fast and offers no compression
The DIY route costs less up front. The trade-offs show up in ergonomics and consistency: hard or lumpy packs cool unevenly, so the top of the wrist gets more cold than the sides where the tendon actually runs. Melting ice also means the temperature drifts during the session, which makes the 15-minute rule harder to trust. Maintaining a steady, controlled temperature is essential for long-term recovery, just as proper form remains the primary defense for preventing wrist injuries during heavy lifting.
Commercial Options and What You Are Paying For
- Gel packs that mold to the wrist, better coverage than peas, but they warm up in 15-20 minutes and need a separate strap for compression
- Wearable compression sleeves with built-in gel, hold their shape, stay cold longer, and add compression in one step
- Dual hot and cold wraps, the same sleeve works for the ice phase and the heat phase, so you are not storing two products
The premium you pay for a commercial sleeve buys three things: even cooling around the whole joint, hands-free wear so you can elevate and rest, and a reusable design that does not leak on your couch.
Cost-Per-Use Reality Check
A bag of frozen vegetables runs a few dollars and can be refrozen, but it degrades with each thaw cycle and is not really a long-term tool. A dedicated gel wrap or sleeve costs more up front, but if you ice three to four times a day during a flare, the per-session cost drops quickly and you stop replacing melted bags.
Skin Safety Applies to Both
Whichever route you pick, the cloth barrier rule does not change. DIY packs and commercial sleeves alike can cause ice burns or a red, itchy rash if they sit directly on skin for too long. Check the skin every few minutes, and stop at once if you feel burning or tingling.
Our Penguin Fingers Wrist Cold Compression Pack delivers 360 degrees of cooling and compression in as fast as 1 to 2 minutes. It is free from PVC, BPA, phthalates, and other irritants, so it is safe to wear daily. For a wrap that also covers the forearm and other joints, our Elbow and Foot Cold Compression Therapy Sleeve works hot or cold and molds to the wrist, elbow, or ankle.
Contraindications and Skin Protection Protocols
Do not use cold therapy if you have poor circulation, Raynaud's syndrome, or numbness in the hand. The National Library of Medicine overview of cryotherapy safety notes that cold injuries can happen fast when skin is exposed too long.
Protect your skin with these habits:
- Always use a cloth barrier between pack and skin
- Check the skin every few minutes for redness or white patches
- Stop at once if you feel burning or tingling
If you have diabetes, nerve damage, or a heart condition, ask your doctor before you start. Cold therapy is safe for most people, but these conditions change the rules.
Common Mistakes to Avoid and When to See a Doctor
The biggest mistake is icing too long and too often. More cold is not better.
Watch for these other slips:
- Skipping the cloth barrier and burning the skin
- Icing a stiff joint that actually needs heat
- Pushing through pain instead of resting the wrist
Fix the source too. Adjust your keyboard height, take breaks, and stretch the forearm. Ice treats the flare, not the habit that caused it.
See a doctor if pain lasts more than two weeks, if the wrist swells suddenly, or if you cannot move it.
Frequently Asked Questions
Does ice help tendonitis in the wrist?
Yes. Cold therapy reduces blood flow to the inflamed tendon, which eases swelling and numbs the area. This is why it works well during the first 48 to 72 hours after a flare-up and after activity. A cold compression wrap combines cooling with gentle pressure, which can help calm a wrist tendonitis flare-up faster than ice alone. For chronic cases, alternate cold with heat based on your symptoms.
How long should you apply cold therapy for wrist tendonitis?
Apply cold for 15 to 20 minutes at a time, then wait at least 60 minutes before repeating. Most people ice three to four times a day during a flare-up. Never leave a cold pack on for more than 20 minutes, as longer sessions can damage skin and nerves. If you use a wearable cold compression sleeve, follow the same timing and check your skin every few minutes.
Should I use heat or cold for chronic wrist tendonitis?
Use cold when the wrist is swollen, hot, or painful after activity. Use heat when the wrist feels stiff but not swollen, especially before stretching or typing. For chronic tendonitis, a common approach is heat before activity to loosen the joint and cold afterward to reduce inflammation. A dual hot and cold sleeve lets you switch without buying two products.
Can cold compression sleeves help reduce tendonitis inflammation?
Cold compression sleeves deliver cooling and pressure at the same time, which can reduce swelling and numb pain in the wrist. Unlike a loose ice pack, a sleeve stays in place and provides 360 degrees of coverage. This makes it easier to ice while working or resting.
Wrist tendonitis rarely clears up on its own if you keep hammering the same joint. You need a routine that calms the flare and a wrap that makes icing easy enough to actually do. Penguin Fingers builds wearable cold compression sleeves with dual hot and cold options, targeted designs for the wrist and other joints, and reusable gel that molds to your body. Get started with Penguin Fingers and give your wrist the steady, hands-free relief it needs to recover.


