

Last Updated: October 26, 2026
Quick Summary
To apply cold compression to an ankle, wrap a cold pack or sleeve around the ankle over a thin towel, fasten it snug like a firm handshake, elevate the foot above heart level, and leave it on for 15 to 20 minutes. Remove the wrap when the timer goes off, even if it still feels good.
- Place a thin towel between the cold source and your skin before wrapping.
- Fasten the wrap so it feels snug like a firm handshake, not a tourniquet.
- Check circulation every few minutes: toes should stay pink, warm, and able to wiggle.
- Remove the wrap right away if toes turn pale or blue, or numbness or tingling appears.
- Check with a doctor first if you have poor circulation, diabetes with reduced foot feeling, or Raynaud's phenomenon.
Table of Contents
- Step-by-Step: How to Apply Cold Compression to Your Ankle
- How to Compress Your Ankle Without Cutting Off Circulation
- How Long to Ice a Sprained Ankle: Timing Guidelines That Work
- Choosing the Best Cold Pack for Ankle Swelling
- Ice or Heat for Ankle Pain? How to Decide
- Warning Signs Your Cold Compression Is Too Intense
- Who Should Check With a Doctor Before Using Cold Compression
- Get Targeted Ankle Relief With Penguin Fingers
- Frequently Asked Questions
Step-by-Step: How to Apply Cold Compression to Your Ankle
Cold compression means applying a cold source and gentle pressure to an injured ankle at the same time. Cold numbs pain and calms inflammation, while compression limits swelling. This guide walks you through using cold compression at home.
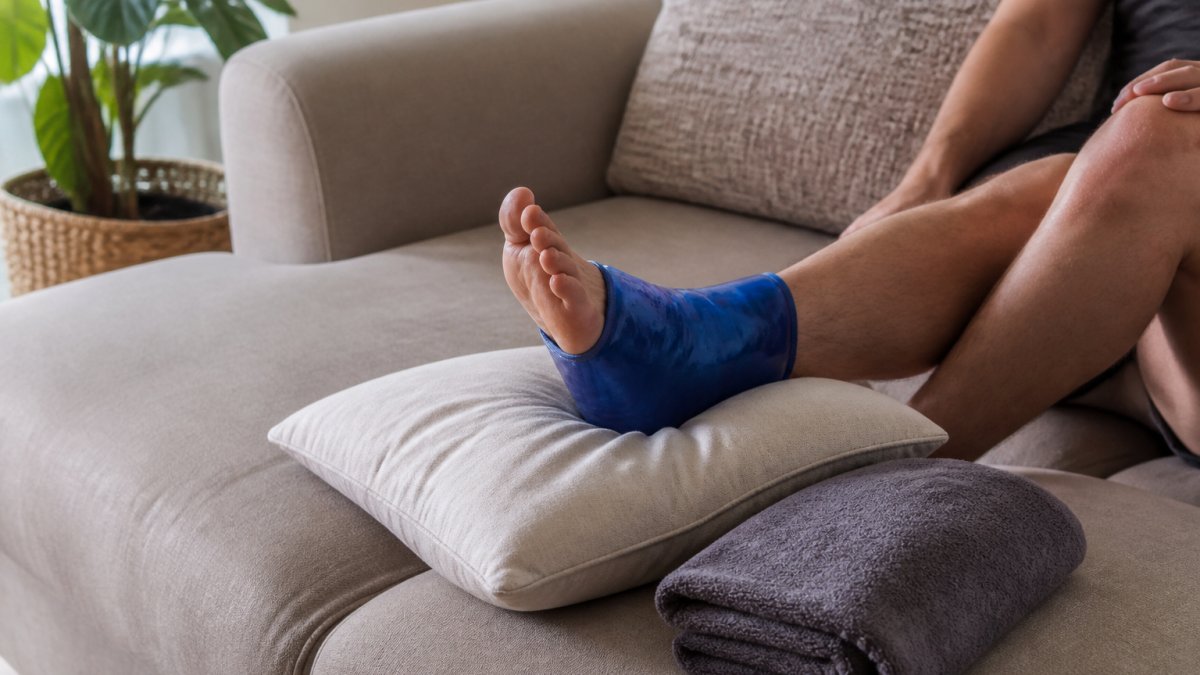
The short version: wrap cold around the ankle, keep the wrap snug but not tight, elevate the foot, and leave it on for a short, timed session. This guide covers timing and wrap tension.
What You'll Need Before You Start
- A cold pack, gel wrap, or cold compression sleeve
- A thin barrier such as a towel or cloth
- An elastic bandage or the strap built into your sleeve
- A cushion or pillow for elevation
- A timer, so you do not over-ice
- Water and a phone within reach
The 6-Step Application Process
Step 1: Check your skin first. Look for cuts, rashes, or numb patches.
Step 2: Set up your barrier. Place a thin towel between the cold source and your skin.
Step 3: Position the ankle. Sit or lie down and bend the ankle to a relaxed 90-degree angle.
Step 4: Apply the cold compression. Wrap the sleeve or pack around the ankle and foot.
Step 5: Elevate above heart level. Prop the ankle on a cushion.
Step 6: Time it and stop. Set a timer for 15 to 20 minutes.
If you are recovering from a sprain specifically, our guide on how to speed up ankle sprain recovery for runners covers the training adjustments that pair with icing.
Here is the six-step routine at a glance, with the timing and wrap tension the article recommends.
| Step | What to do | Key detail |
|---|---|---|
| 1 | Check your skin first | No cold over cuts, rashes, or numb patches |
| 2 | Set up your barrier | Thin towel between cold source and skin |
| 3 | Position the ankle | Sit or lie down, relaxed 90-degree angle |
| 4 | Apply the cold compression | Snug like a firm handshake, not a tourniquet |
| 5 | Elevate above heart level | Prop the ankle on a cushion |
| 6 | Time it and stop | Set a timer for 15 to 20 minutes |
How to Compress Your Ankle Without Cutting Off Circulation
Compression is the part of cold compression people get wrong most often. The goal is gentle, adjustable pressure that supports the ankle and limits swelling, not a tight wrap that squeezes the blood vessels shut. Too loose and it slides off; too tight and it causes numbness, tingling, and skin damage.
Check circulation before you wrap
Before you apply any compression, establish a baseline to compare against. This takes about 30 seconds:
- Look at the toes on the injured foot. Note the color, pink is normal for most people.
- Press a toenail until it turns white, then release. The pink color should return within about two seconds.
- Ask yourself whether the toes feel normal in temperature and sensation compared with the other foot.
- Wiggle the toes. You should be able to move them freely.
If the foot already looks pale, blue, unusually cold, or feels numb before you start, do not apply compression.
How snug should the wrap be?
A useful rule: the wrap should feel like a firm handshake, not a tourniquet. You should feel support when you move the ankle, but not throbbing, pulsing, or pressure that builds over the session.
The finger-slide test is the quickest check. Slide one finger under the edge of the wrap; it should go in with mild resistance. If it slides in easily, tighten one notch. If you cannot fit a finger under the edge at all, loosen it immediately.
A second check is the toe test. After you fasten the wrap, compare the toes with your baseline: they should still be pink, warm, and able to wiggle.
Penguin Fingers Elbow and Foot Cold Compression Therapy Sleeve →
Check circulation during the session
Do not wrap once and walk away. Check every few minutes while the cold compression is on:
- Color: Toes should stay pink. Pale, white, gray, or blue toes mean the wrap is too tight.
- Temperature: The toes should not feel colder than the rest of the foot. Cold toes with a warm ankle is a warning sign.
- Sensation: You should feel the cold and the pressure, but not numbness, tingling, or "pins and needles."
- Capillary refill: Press a toenail until it whitens, release, and count. Pink should return within about two seconds. If it stays white or returns slowly, loosen the wrap.
- Pain: The ankle may ache, but the wrap should not cause sharp pain or a throbbing sensation that worsens.
Adjust, do not abandon
When in doubt, go looser. A slightly loose wrap you can wear comfortably for the full session beats a tight wrap you have to remove after five minutes because your toes are tingling.
How Long to Ice a Sprained Ankle: Timing Guidelines That Work
A clinical commentary published in the Parker University journal notes that the evidence supports ice for dulling and relieving pain. That is the main job of the early sessions: comfort and swelling control while the ankle starts to heal.
For a fuller breakdown of session length across different body parts, read our guide on how long to use cold compression.
Choosing the Best Cold Pack for Ankle Swelling
If you are weighing the two main styles, our comparison of an ice pack versus a compression sleeve breaks down which works better for different injuries.
Ice or Heat for Ankle Pain? How to Decide
A review indexed by PubMed Central describes cold and compression as routinely used after acute injury or surgery to ease pain, reduce swelling, and speed functional recovery. That is the standard we follow.
When Heat Helps (and When It Hurts)
If you are unsure whether heat is safe for your situation, our article on when to avoid heat therapy for joint pain explains the warning signs.
Warning Signs Your Cold Compression Is Too Intense
Stop and remove the wrap if you notice any of these:
- Numbness that does not fade after removal
- Skin turning white, gray, or blue
- Sharp burning or stinging under the wrap
- Tingling or "pins and needles" in the toes
- Pain that gets worse instead of better
Who Should Check With a Doctor Before Using Cold Compression
Cold compression is low-risk for most healthy adults, but not risk-free. Cold narrows blood vessels and compression adds external pressure, so anyone with compromised circulation, sensation, or skin should get medical clearance before treating an ankle at home.
Check with a healthcare provider first if you:
- Have poor circulation or peripheral artery disease. Cold and compression both reduce blood flow to the foot. If circulation is already limited, the combination can worsen it.
- Have diabetes with reduced feeling in your feet. Neuropathy can mask the early warning signs of cold or pressure injury, numbness, tingling, or skin changes, so damage can happen before you notice it.
- Have Raynaud's phenomenon or cold sensitivity. Cold can trigger intense vasospasm in the fingers and toes, turning them white or blue and painful. A cold ankle wrap can set this off.
- Have nerve damage in the ankle or foot. Reduced sensation means you may not feel a wrap that is too tight or cold that is too intense.
- Are recovering from recent surgery on the ankle or foot. Your surgeon's instructions for compression and cold take priority over any general guide, including this one.
- Have an open wound, infection, or skin condition near the joint. Cold over broken or infected skin can delay healing and worsen the problem. Do not apply cold compression over an open wound.
- Are unsure how severe the injury is. If you cannot bear weight, the ankle is deformed, or the swelling is severe, you need an assessment before home treatment.
Signs you should stop and seek care
- Numbness, tingling, or "pins and needles" in the toes that does not fade within a few minutes of removing the wrap
- Skin that turns white, gray, or blue and does not return to pink
- Sharp burning or stinging under the wrap
- Pain that gets worse instead of better during or after a session
- Swelling that increases despite cold compression and elevation
- Inability to bear weight on the ankle, or pain that is severe or worsening after a couple of days
- A hot, red, swollen ankle that may signal infection
A note on timing and severity
During the first day or two after an injury, cold compression is most useful for comfort and swelling control. It does not speed healing and is not a substitute for assessment. If the injury is severe, you heard a pop, cannot put weight on the foot, or the ankle looks deformed, skip the home routine and seek care first. Transitioning from acute management to active rehabilitation remains the most effective way to speed up recovery.
Get Targeted Ankle Relief With Penguin Fingers
That is why we recommend the Penguin Fingers Elbow and Foot Cold Compression Therapy Sleeve as a wearable option.

The sleeve is described as soft, flexible, and stretchy neoprene, filled with fast-freezing gel. It is designed to wrap around the elbows, ankles, feet, forearms, wrists, and other joints. It can be kept in the freezer for cold therapy or warmed in the microwave.
Frequently Asked Questions
How do I apply a cold compress to my ankle?
Wrap a gel cold pack or ice pack in a thin towel, place it around your ankle, and secure it with an elastic bandage or compression strap. Keep the wrap snug but not tight, and elevate your ankle above heart level. Leave it on for 15 to 20 minutes, then remove it and check your skin. Repeat every 1 to 2 hours as needed during the first 48 hours after injury.
Should you put a cold pack directly on your skin?
No. Always place a thin barrier, like a towel or cloth, between the cold pack and your skin. Direct contact can cause frostbite or skin damage, especially with gel packs straight from the freezer. A barrier still lets the cold through while protecting your skin. Check your skin every few minutes for numbness or discoloration, and stop if you notice either.
How long should you ice a sprained ankle?
Apply cold compression for 15 to 20 minutes at a time, then take the pack off for at least 20 minutes before reapplying. You can repeat this 3 to 4 times a day, or every 1 to 2 hours during the first 48 hours after injury. Never leave a cold pack on for more than 20 minutes, as prolonged exposure can harm skin and tissue.
When should you seek medical care for an ankle injury?
See a doctor if you cannot bear weight on the ankle, notice severe swelling or deformity, feel numbness or tingling that does not go away, or if pain worsens despite rest, ice, compression, and elevation. Also seek care if you have diabetes, poor circulation, or a history of blood clots before using cold compression. These conditions raise the risk of skin damage from cold therapy.
A sore ankle is frustrating, and guessing at wrap tension and timing makes it worse. Cold compression done right is simple, but the details matter. Penguin Fingers makes wearable cold compression sleeves that take the guesswork out of positioning and pressure, with dual hot and cold options and targeted designs for the ankle, foot, and other joints. Get started with Penguin Fingers and give your ankle the steady, hands-free relief it needs to recover.


