

Table of Contents
- What You'll Need for Cold Compression Therapy at Home
- How to Make a Cold Compress: DIY Options
- Step-by-Step: How to Apply Cold Compression Therapy
- How Long to Leave Cold Compression On
- Cold Therapy Safety Guidelines You Must Follow
- Cold vs. Heat: Which Therapy Should You Use?
- Best Cold Compression for Sports Recovery
- Conclusion
- Frequently Asked Questions
Last Updated: September 8, 2026
Cold compression therapy combines cold temperature with pressure to reduce swelling, numb pain, and support recovery after an injury. In this guide from Penguin Fingers, we break down how to do cold compression therapy at home, covering DIY methods, timing, safety, and when heat is the better call.

Most guides treat compression as an afterthought, but it is the half of the equation that keeps the cold where it belongs. The real benefit of cold compression therapy comes from the pairing: cold reduces metabolic rate and nerve conduction to dull pain, while compression limits edema by giving swollen tissue nowhere to expand.
What You'll Need for Cold Compression Therapy at Home
Gather a few specific supplies for a clean, effective session.
- A cold source: A reusable gel pack, a bag of frozen vegetables, or a purpose-built cold pack. Gel packs stay flexible when cold, conforming to the joint better than rigid ice packs.
- A compression layer: An elastic bandage (like an ACE wrap), a cohesive bandage (like Coban), or a wearable sleeve with a built-in gel pack. This is the most critical and most misunderstood component.
- A moisture barrier: A thin cloth or paper towel between the cold source and your skin. This prevents frostbite and maceration.
- An insulating layer for longer sessions: A dry towel over the cloth if you plan to go past 15 minutes.
The Compression Layer: Why It Matters and How to Get It Right
Most DIY guides treat compression as an afterthought, but it is what makes this therapy effective. Cold therapy constricts blood vessels (vasoconstriction), reducing blood flow and limiting the fluid that causes swelling. Compression adds external pressure that physically prevents edema from accumulating. Together, they attack swelling from both the inside (vascular) and outside (mechanical).
Here's how to execute the compression layer properly:
- Choose your wrap. An ACE bandage is the standard choice because it's reusable and adjustable. Cohesive bandages (like Coban) stick to themselves, not your skin, and provide more uniform pressure without slipping. Avoid regular medical tape or a non-elastic strap, these can create pressure points and cut off circulation.
- Apply with even tension. When wrapping an ACE bandage, start at the point farthest from your heart (distal) and wrap toward the heart (proximal). Each layer should overlap the previous one by about half the bandage's width. The tension should be firm but not painful, you should be able to slide one finger comfortably under the final wrap.
- Watch for the signs of over-compression. Numbness, tingling, or a throbbing sensation below the wrap means you've wrapped too tightly. Loosen it immediately. A common mistake is wrapping tighter to keep the ice pack from shifting, which restricts venous return and actually worsens swelling.
- Consider a wearable sleeve for consistency. A cold compression sleeve with a built-in gel pack solves the two biggest DIY problems: the pack shifting and the wrap loosening. The elastic sleeve provides even, consistent pressure across the entire joint surface, which is nearly impossible to achieve with a loose bag of peas and an ACE bandage. If you're treating a joint that moves (like a knee or ankle), a sleeve is significantly more reliable than a manual wrap.
For a one-time acute sprain, an ACE bandage over a gel pack works fine. For recurring issues like tendinitis or post-exercise recovery, a dedicated sleeve is worth the investment because it removes the guesswork from every session.

How to Make a Cold Compress: DIY Options
A homemade cold compress is simple to assemble with items already in your kitchen.
For a basic DIY cold pack, fill a sealable bag with ice cubes and a little water, or use a bag of frozen vegetables like peas or corn. The smaller pieces conform to the shape of your wrist, finger, or ankle better than large ice cubes. Wrap the bag in a damp cloth before applying.
The limitation of DIY is the compression piece. You can achieve it by wrapping an elastic bandage over the bag, but the pressure tends to loosen as the pack shifts. A common mistake is wrapping too tightly to compensate, which restricts blood flow. The gel pack inside a compression sleeve distributes cold and pressure evenly, which is harder to replicate with loose ice.
Step-by-Step: How to Apply Cold Compression Therapy
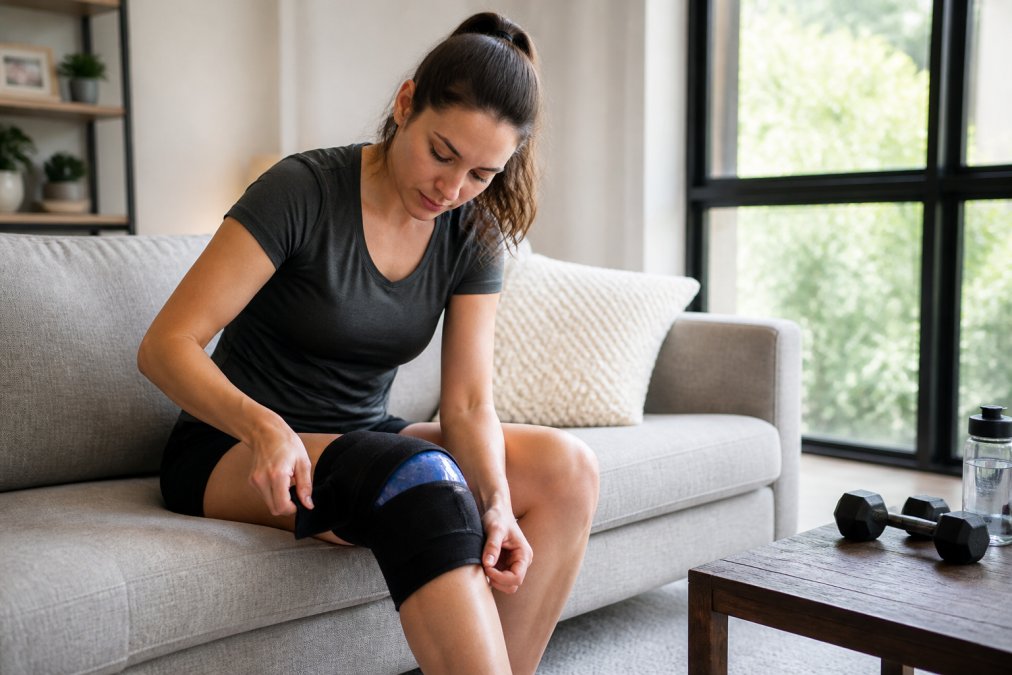
Follow these steps to apply cold compression therapy correctly.
- Place the cold pack. If using a gel pack, ensure it is chilled but not frozen solid. A partially frozen pack conforms better to the joint.
- Add a moisture barrier. Put a thin cloth between the cold pack and your skin. This prevents frostbite and skin damage.
- Apply the compression layer. Wrap an elastic bandage over the pack, or put on a wearable compression sleeve. The fit should be snug but not tight enough to cause numbness or tingling.
- Position the joint at rest. Elevate the injured area above heart level when possible. This works with gravity to further reduce swelling.
- Set a timer. Do not rely on your memory. Cold therapy works in intervals, and leaving it on too long causes more harm than good.
How Long to Leave Cold Compression On
The recommended duration for cold compression therapy is 15 to 20 minutes per session (orthoinfo.aaos.org). This is enough to cool the tissue and constrict blood vessels without risking skin damage.
After a session, leave the area uncovered for at least 45 to 60 minutes. This lets the tissue return to normal temperature before you apply cold again. You can repeat the cycle several times a day, especially in the first 48 hours after an acute injury.
For chronic conditions like arthritis or tendinitis, one or two sessions per day is usually sufficient. A good rule of thumb is to stop if the area feels numb beyond the cold sensation, or if your skin appears red and blotchy after removing the pack.
| Application Type | Duration | Frequency | Best For |
|---|---|---|---|
| Acute injury (first 48 hours) | 15-20 min | Every 2-3 hours | Sprains, strains, swelling |
| Chronic joint pain | 15-20 min | 1-2 times daily | Arthritis, tendinitis |
| Post-exercise recovery | 10-15 min | Once after activity | Muscle soreness, sports recovery |
Cold Therapy Safety Guidelines You Must Follow
Cold compression therapy is safe for most people, but there are specific situations where you should skip it entirely. Never apply cold therapy to an area with poor circulation, and avoid it if you have conditions that affect how your body senses temperature.
Contraindications: When to Skip Cold Therapy Entirely
These conditions require you to avoid cold therapy unless a physician explicitly clears you:
- Raynaud's phenomenon: This condition causes blood vessels in the fingers and toes to overreact to cold, triggering spasms that cut off circulation. Applying cold therapy can provoke a severe attack, causing intense pain and potential tissue damage.
- Diabetes with peripheral neuropathy: Diabetes often causes nerve damage that reduces sensation in the extremities. You may not feel the early warning signs of frostbite, numbness, tingling, or burning, until significant tissue damage has already occurred.
- Peripheral vascular disease (PVD): Conditions like atherosclerosis or claudication already restrict blood flow. Cold therapy further constricts vessels, potentially worsening ischemia.
- Deep vein thrombosis (DVT): If you have a suspected or confirmed blood clot, do not apply compression or cold. Compression can dislodge the clot, and cold can mask the symptoms of a medical emergency.
- Cold allergy (cold urticaria): A rare but real condition where cold exposure triggers hives, swelling, or in severe cases, anaphylaxis. If you've ever broken out in hives after being in cold water or weather, do not use cold therapy.
- Open wounds or blistered skin: Cold therapy on broken skin increases the risk of infection and delays healing. Wait until the skin has fully closed.
The Frostbite Timeline: What Happens and When
Frostbite from cold therapy isn't an instantaneous event, it follows a predictable timeline that you can interrupt:
- 0-5 minutes: You feel intense cold, then a dull ache. The skin may appear red.
- 5-10 minutes: The area becomes numb. This is normal and part of the therapeutic effect, but it's also when you lose the ability to feel damage occurring.
- 10-15 minutes: The skin may appear pale or waxy. This is the first visual warning sign.
- 15-20 minutes: This is the maximum safe limit for most people. Beyond this, ice crystals can form in the tissue, causing irreversible damage.
- 20+ minutes: Frostbite sets in. The skin turns white or grayish-yellow, becomes hard, and may blister within 24 hours.
The American Academy of Orthopaedic Surgeons guidance on ice therapy emphasizes that ice should never be applied for longer than 20 minutes at a time. The National Institutes of Health cold therapy safety guidelines further notes that individuals with sensory impairments should never self-administer cold therapy without a caregiver present.
Skin Protection: The Barrier Is Non-Negotiable
A thin cloth barrier between the cold source and your skin is not optional, it's the difference between therapy and injury. Here's what to use and what to avoid:
- Use: A single layer of cotton cloth (like a t-shirt or dish towel), a paper towel, or a commercial gel pack cover. The barrier should be thin enough to allow cold to penetrate but thick enough to prevent direct skin contact.
- Avoid: Thick towels or blankets that completely insulate the skin from the cold, these defeat the purpose. Also avoid wet cloth, which conducts cold more aggressively and increases frostbite risk.
Post-Application Skin Care
What you do after removing the cold pack matters as much as what you do during the session:
- Inspect the skin immediately. Look for redness, blotchiness, or any white or waxy patches. Mild redness that fades within 15 minutes is normal. Persistent redness or mottling indicates the cold was applied too long or too intensely.
- Do not rub or massage the area. Rubbing frostbitten or overly cold skin can cause further tissue damage. Let the area rewarm naturally.
- Allow the skin to return to normal temperature before reapplying cold. This typically takes 45-60 minutes. Applying cold too frequently doesn't enhance the therapeutic effect, it just increases the risk of tissue damage.
- Moisturize after the skin has fully rewarmed. Cold therapy can dry out the skin, especially with repeated sessions. A fragrance-free moisturizer helps maintain skin integrity.
- Watch for delayed reactions. If you develop blisters, intense itching, or a burning sensation hours after the session, you may have experienced a mild cold injury. Stop therapy and consult a healthcare provider.
If you experience any of the following during or after a session, seek medical attention: skin that remains white or waxy after 15 minutes of rewarming, blistering, severe pain, or loss of sensation that persists beyond the expected numbness window.
Cold vs. Heat: Which Therapy Should You Use?
Cold and heat serve opposite purposes, and using the wrong one can slow your recovery. Cold therapy is for acute injuries and inflammation. Heat therapy is for muscle stiffness and chronic joint pain without swelling.
Use cold when you have a fresh injury, visible swelling, or throbbing pain. Use heat when you have stiff muscles, joint stiffness, or arthritis pain that improves with movement. If you are unsure, remember that heat increases blood flow and can worsen acute inflammation.
For conditions like arthritis, many people alternate between the two. Cold compression therapy in the morning reduces swelling after a night of inactivity, while heat later in the day relaxes stiff muscles. Penguin Fingers makes this easy with dual hot and cold therapy options, meaning one sleeve handles both temperature needs.
Best Cold Compression for Sports Recovery
Athletes and active individuals often need cold compression therapy in a format that stays put during movement. A loose ice pack does not work well when icing a knee after a long run or a wrist after climbing.
The most practical option for sports recovery is a wearable cold compression therapy sleeve. These combine the gel pack and compression into one design that straps around the specific joint. For finger and toe injuries from climbing or bouldering, a targeted sleeve like the Penguin Fingers Cold Compression Gel Packs for Fingers and Toes delivers cold therapy exactly where a bag of peas cannot stay.
For knees and larger joints, the Penguin Fingers Knee Cold Compression Therapy Sleeve offers a larger coverage area that also fits thighs and calves. The benefit of a dedicated sleeve is consistent compression throughout the session, which is the part of cold compression therapy that most DIY methods get wrong.
Conclusion
Cold compression therapy at home comes down to three variables: cold source, compression, and timing. Keep sessions between 15 and 20 minutes, always use a cloth barrier, and let the area rest for at least 45 minutes between applications.
The main challenge is keeping the cold pack in place with even pressure. That is where a wearable sleeve outperforms a DIY setup. Penguin Fingers designs cold compression therapy sleeves for specific body parts, from fingers and toes to knees and elbows, with dual hot and cold options so you can treat both acute injuries and chronic joint pain with one product.
Get started with Penguin Fingers and find a sleeve sized for your specific joint, so you can recover faster and get back to the activities you enjoy.
Frequently Asked Questions
Does cold compression therapy actually work?
Yes. Cold compression therapy combines two proven methods: cryotherapy and pressure. Cold reduces blood flow to the area, which limits swelling and numbs nerve endings to ease pain. Compression provides structural support and helps prevent fluid buildup, known as edema. Together, they are more effective for acute injuries and post-exercise recovery than using a standard ice pack alone. For best results, apply within 48 hours of an injury and follow the recommended timing guidelines.
How long should I leave a cold compression sleeve on?
Limit each session to 15 to 20 minutes. Leaving the sleeve on longer increases the risk of frostbite or nerve damage. After the session, remove the sleeve and let your skin return to its normal temperature for at least 45 to 60 minutes before reapplying. You can repeat this cycle several times a day for the first 48 hours after an injury. Never sleep while wearing a cold compression sleeve.
What is the best way to do a cold compression wrap?
The best method combines a cold source with even, moderate pressure. Start with a gel pack chilled in the freezer or a bag of frozen vegetables wrapped in a damp cloth. Place it directly over the injury, then wrap an elastic bandage snugly around it. The wrap should feel firm but not tight enough to cut off circulation. Check for numbness or tingling in your fingers or toes, and loosen the wrap if you notice either.
Is cold compression therapy safe for daily use?
Yes, for most people. You can safely apply cold compression several times a day for acute injuries or chronic conditions like arthritis. The key is respecting the therapeutic interval: 15 to 20 minutes on, followed by at least 45 minutes off. If you have diabetes, poor circulation, or nerve damage, talk to your doctor first. Always place a thin cloth between your skin and the cold pack to prevent frostbite.
This article is for informational purposes only and does not constitute medical advice. Always consult a healthcare provider before starting a new treatment, especially if you have an underlying condition.


