

Table of Contents
- Materials You'll Need for Homemade Cold Packs
- Step-by-Step Instructions for DIY Cold Compression Therapy
- How Long to Ice Joints for Inflammation Relief
- Ice vs. Heat for Joint Pain: When to Use Each
- Safety Precautions and Storage Guidelines
- Homemade vs. Professional Cold Packs: What You Should Know
- Frequently Asked Questions
Last Updated: September 24, 2026
Materials You'll Need for Homemade Cold Packs
Making homemade cold packs requires common household items and attention to material safety, especially if the pack leaks near skin or food.
Here's what you'll gather:
- Zipper storage bags (gallon or quart size, depending on joint size; food-grade or freezer-grade recommended)
- Rubbing alcohol (70% isopropyl alcohol works best; non-toxic but not for ingestion)
- Dish soap (any liquid brand; food-safe varieties preferred)
- Corn syrup (optional, for a gel-like consistency; food-grade)
- Water (filtered or tap)
- Towel or cloth (to wrap around the pack for skin protection)
Why Material Safety Matters
Rubbing alcohol lowers the freezing point, keeping your pack flexible. However, 70% isopropyl alcohol is not food-safe and can contaminate food if the pack leaks. Double-bagging and regular seal inspections are critical.
Dish soap adds viscosity and distributes cold evenly. Corn syrup is food-grade and safe, making it a lower-risk thickening agent.
Food-Grade vs. Standard Ingredients
If you have young children or pets, consider food-grade alternatives: food-grade isopropyl alcohol (2-3 times the price but safer if ingested), food-safe dish soap, corn syrup, and food-grade storage bags. These reduce harm if accidental contact occurs, though children should never ingest the pack's contents.
Zipper Bag Selection
Freezer-grade bags are thicker and more durable than standard storage bags, resisting cracking and seal failure. Gallon-sized bags work for knees and elbows; quart-sized bags suit fingers and wrists. Cut edges are weaker than factory seals, so avoid custom cutting.
Avoiding Common Material Mistakes
Avoid acetone, bleach, ammonia, alcohol above 90% concentration, and gel-based hand sanitizers. High-concentration alcohol freezes solid and doesn't flex. Toxic chemicals pose serious health risks if the seal fails. Gel products separate during freezing, creating uneven cold spots.
Step-by-Step Instructions for DIY Cold Compression Therapy
Method 1: Rubbing Alcohol and Dish Soap
This is the most straightforward approach. The rubbing alcohol prevents the pack from freezing solid, while dish soap helps the mixture stay consistent.
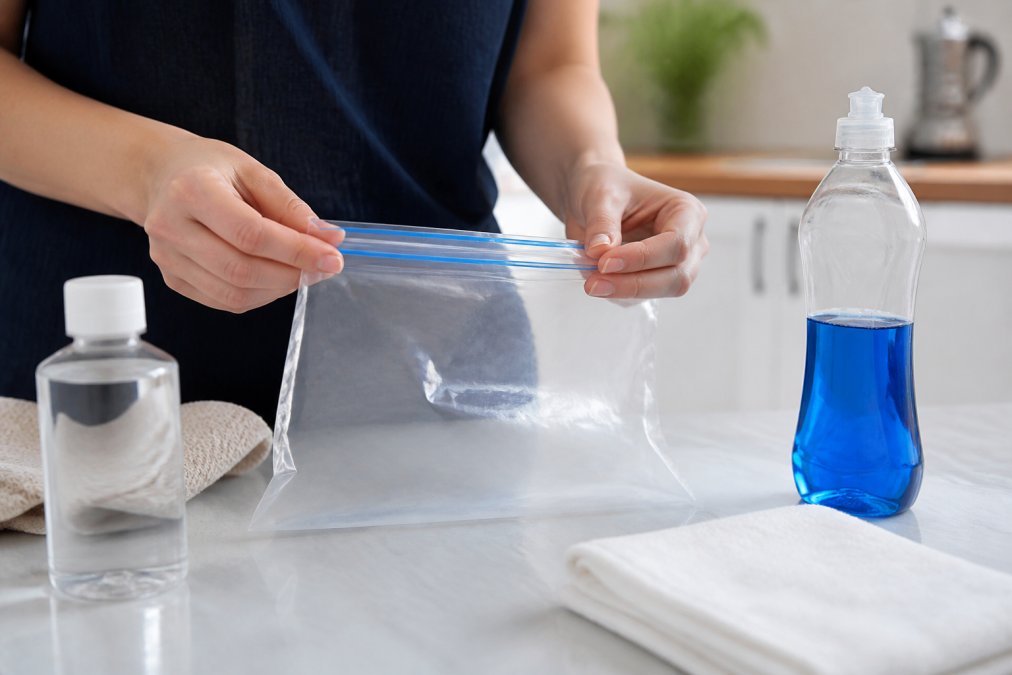
Step 1: Mix the base liquid
Pour one part rubbing alcohol and one part water into your zipper bag. The 1:1 ratio freezes at approximately 27°F, staying pliable instead of rock-solid.
Step 2: Add dish soap
Add about one tablespoon of dish soap per cup of liquid. This thickens the solution and prevents sloshing. Too much creates foam; too little leaves it too liquid.
Step 3: Seal and test
Seal the bag carefully, squeezing out excess air. Gently squeeze over a sink to check for leaks.
Step 4: Freeze
Freeze for 6-8 hours. The pack should be cold but still flexible, you should be able to bend it gently without cracking.
Step 5: Wrap before applying
Never apply directly to skin. Wrap in a thin towel or cotton t-shirt fabric to prevent ice burn and transfer cold effectively.
Method 2: Corn Syrup for Flexible Gel Consistency
Corn syrup creates a gel-like consistency that molds better to irregular joint shapes but takes longer to freeze.
Step 1: Combine ingredients
Mix one cup each of corn syrup and water in your zipper bag. The corn syrup acts as a gel base and increases viscosity.
Step 2: Add alcohol and soap
Add half a cup of rubbing alcohol and one tablespoon of dish soap. Stir thoroughly until the mixture resembles thin pudding.
Step 3: Seal carefully
Press out air bubbles before sealing. The thicker consistency makes this step important. Any trapped air creates cold spots and weakens the seal.
Step 4: Freeze longer
Penguin Fingers Knee Cold Compression →
Corn syrup packs need 8-12 hours to reach full consistency. Check after 6 hours; if still too liquid, return to freezer.
Step 5: Test flexibility
Remove the pack from the freezer and gently bend it.
Joint-Specific Ergonomic Design Patterns
Shape your pack to match your joint's contours to improve contact and reduce cold spots. Freeze the pack in the position you'll use it: mold it to your knee, elbow, wrist, ankle, or shoulder while still liquid, then freeze. This creates a custom ergonomic shape that stays in place and maximizes contact. Consistent application of this tailored cold therapy remains a cornerstone of managing post-surgery swelling when recovering from complex joint procedures.
Temperature Regulation and Ice Burn Prevention
Homemade packs freeze to approximately 27°F. However, ice burn can still occur with prolonged or direct contact.
Prevention protocol:
- Always wrap the pack in a towel, minimum one layer of cotton fabric
- Limit each session to 15-20 minutes maximum
- Remove immediately if you feel burning, numbness, or tingling
- Wait at least 1-2 hours between sessions
- Check your skin after each session; redness should fade within 30 minutes
Reusable Lifespan and Material Degradation
Homemade packs degrade over time. Homemade packs degrade over time.
Signs of degradation:
- Seal weakening (leaks when squeezed gently)
- Mixture separation (liquid pools at the bottom; gel separates from liquid)
- Discoloration (mixture turns cloudy or develops a film)
- Reduced flexibility (pack becomes too stiff or too liquid)
How Long to Ice Joints for Inflammation Relief
The ideal duration is 15-20 minutes per session. After 20 minutes, cold becomes less effective and ice burn risk increases.
Timing depends on your specific condition:
- Acute inflammation (first 48 hours after injury): 15-20 minutes, every 2-3 hours
- Chronic joint pain (arthritis, tendinitis): 15-20 minutes, once or twice daily
- Post-workout soreness: 15 minutes within 30 minutes of activity
- Migraine relief: 10-15 minutes applied to the head or neck
Ice vs. Heat for Joint Pain: When to Use Each
Cold and heat serve different purposes in joint pain management. Using the wrong one at the wrong time can slow recovery.
Use cold therapy when:
- Swelling is present
- Pain started within the last 48 hours
- The joint feels hot to the touch
Use heat therapy when:
- Stiffness is the main complaint
- Pain has been present for more than 3 days
- The joint feels tight or restricted
Safety Precautions and Storage Guidelines
Homemade cold packs are safe when you follow basic precautions. The main risks come from improper storage, direct skin contact, and extended application times.
Before each use:
- Inspect the bag for leaks or damage
- Check that the seal is completely closed
- Shake gently if the mixture has separated
- Wrap the pack in a towel before applying
Skin protection rules:
- Never apply directly to bare skin
- Use a thin cloth barrier
- Stop immediately if you feel burning or numbness
- Limit each session to 20 minutes maximum
- Wait at least 1-2 hours between sessions
Storage best practices:
- Keep packs in a dedicated freezer section away from food
- Store upright in a box to prevent leaks from spreading
- Check seals monthly for small tears
- Replace packs if the seal weakens or the mixture separates
- Label packs with the date made
If a leak occurs:
- Remove the pack immediately
- Wipe up spilled liquid with paper towels
- Do not let the mixture contact food
- Dispose of the damaged pack in the trash
Homemade vs. Professional Cold Packs: What You Should Know
Homemade packs offer:
- Low cost (typically under $5 per pack)
- Customizable size and shape
- Ingredients you control
- Flexibility when frozen
Homemade packs lack:
- Consistent compression force
- Ergonomic joint-specific design
- Durability and reliability
- Professional-grade temperature regulation
The Penguin Fingers Wrist Cold Compression Pack is designed for the specific needs of people with carpal tunnel or repetitive strain. Unlike a generic homemade pack, it delivers compression and cold exactly where you need it, with a design that stays in place while you work or rest.
Frequently Asked Questions
How can I make my own instant cold pack?
Mix rubbing alcohol and liquid dish soap in a 1:1 ratio inside a freezer-safe zipper storage bag. Seal it completely and place it in the freezer for 2-3 hours. The alcohol lowers the freezing point, keeping the pack flexible even when frozen. For a thicker gel consistency, use corn syrup instead of dish soap. Double-bag your pack to prevent leaks and ice burn on skin contact.
How long should I ice my joints for inflammation?
Apply cold therapy for 15-20 minutes at a time, with at least 2 hours between applications. This duration is effective for reducing swelling without risking ice burn. For acute inflammation from sprains or strains, use cold packs every 2-3 hours during the first 48 hours. If inflammation persists beyond a few days, consult a healthcare provider to determine whether heat therapy might be more appropriate.
Are homemade cold packs as effective as professional therapy sleeves?
Homemade packs deliver effective cold therapy for pain and swelling reduction, but professional cold compression therapy sleeves like those from Penguin Fingers offer ergonomic design, consistent temperature regulation, and targeted compression. Professional sleeves conform to specific joints (fingers, wrists, knees, elbows) and provide hands-free wear.
What's the difference between using ice and heat for joint pain?
Use ice (cold therapy) immediately after injury or during acute inflammation to reduce swelling and numb pain. Heat works better for stiff, chronic joint pain and muscle tension because it improves blood flow and relaxes muscles. Cold packs are ideal for the first 48 hours after a sprain, strain, or flare-up. After that window, heat may provide more relief for conditions like arthritis. Some people alternate both methods, cold first, then heat, for maximum benefit.


