

Table of Contents
- Why Downhill Hiking Causes Knee Pain
- The Biomechanics Behind Knee Joint Stress
- Best Knee Exercises for Hikers
- How to Use Trekking Poles for Downhill
- How to Treat Tendonitis at Home
- Immediate Relief and Recovery
- When to See a Doctor
- Conclusion
Last Updated: August 26, 2026
Why Downhill Hiking Causes Knee Pain
Downhill hiking places extreme stress on your knees through impact forces three to six times your body weight with each step (peer-reviewed research). This repetitive eccentric loading, where muscles lengthen while contracting to control descent, creates inflammation and joint stress that accumulates over hours. Many hikers feel fine during the hike, then wake the next morning with stiffness lasting days, signaling cartilage irritation and inflammation.
Your knees weren't designed for steep downhill pounding, especially without proper conditioning. The quadriceps, glutes, and stabilizer muscles must work overtime to keep your knee stable and prevent inward collapse. When those muscles fatigue, your knee joint absorbs the full force of each step. Understanding this biomechanics is the first step to prevention. At Penguin Fingers, we provide targeted cold compression therapy designed specifically for knee recovery after demanding trail work.

The Biomechanics Behind Knee Joint Stress
Your knee is a hinge joint built for forward and back movement, but downhill hiking forces it to absorb lateral and rotational stress it's not designed to handle efficiently. When you step down, your quadriceps must lengthen while pulling hard to slow descent, eccentric loading far more damaging to muscle fibers than lifting.
Poor gait mechanics, like inward knee collapse or overly long steps, multiply stress on the joint. Patellar tendonitis often follows downhill hiking because your patellar tendon, connecting your quadriceps to your shinbone, bears enormous tension during descent. Repetitive motion combined with impact creates inflammation felt as sharp aches below the kneecap or dull throbs worsening the day after hiking.
Ankle flexibility plays a larger role than most hikers realize. Tight ankles force knees to rotate and bend at odd angles, causing poor joint alignment that wears cartilage unevenly and increases bursitis risk. As your glutes and quadriceps tire, stabilizer muscles can't keep your knee tracking properly, causing wobbling and shifting that stresses ligaments and cartilage. This is why the last mile often triggers pain onset.
Best Knee Exercises for Hikers
Preventing knee pain requires building strength in muscles that stabilize your knee during descent, targeting the exact eccentric loading pattern that causes damage on the trail.
Single-leg squats are the gold standard. Stand on one leg and lower yourself slowly over three seconds, keeping your knee aligned over your ankle. Do 8 repetitions per leg, three times weekly, progressing with added weight or depth.
Step-downs mimic downhill motion exactly. Stand on a 12-inch box, lower one leg to the ground slowly over three seconds while keeping your standing leg straight, then step back up. Perform 10 repetitions per leg, three times weekly. This builds eccentric strength and teaches controlled descent.
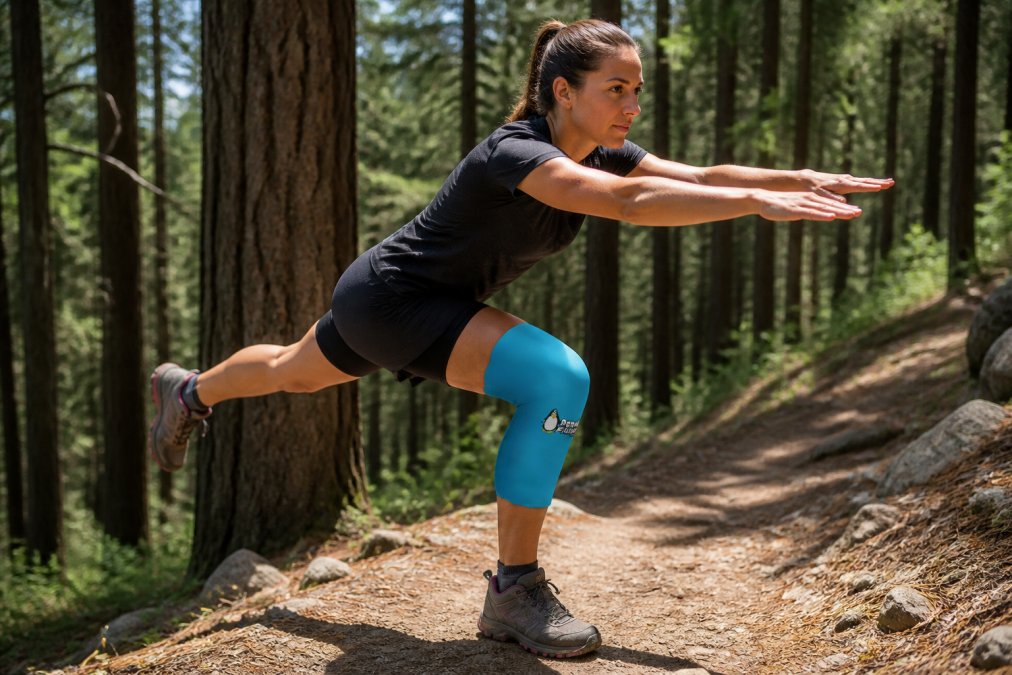
Lateral band walks strengthen glutes and hip stabilizers, preventing inward knee collapse. Loop a resistance band above your knees and step sideways slowly for 15 steps in each direction, three times weekly.
Calf raises and ankle flexibility work improve ankle mobility, reducing compensatory knee stress. Perform calf raises on a step three times weekly and spend five minutes daily stretching calves and performing ankle circles.
Start these exercises at least six weeks before major hiking trips. Consistency matters more than intensity, three focused sessions weekly builds the strength you need.
How to Use Trekking Poles for Downhill
Trekking poles transfer 20-30 percent of your body weight away from your knees to your upper body, dramatically reducing joint stress and impact force (peer-reviewed research). Most hikers underutilize them or use them incorrectly.
Adjust poles so your elbows bend at roughly 90 degrees on flat ground. For descent, shorten them slightly to change your body angle and distribute weight more effectively.
Proper grip technique is critical. Slip your hand through the wrist strap from underneath, letting the strap support most weight while your fingers relax around the pole. This distributes effort across larger muscle groups rather than just your hands. natural knee pain remedies.
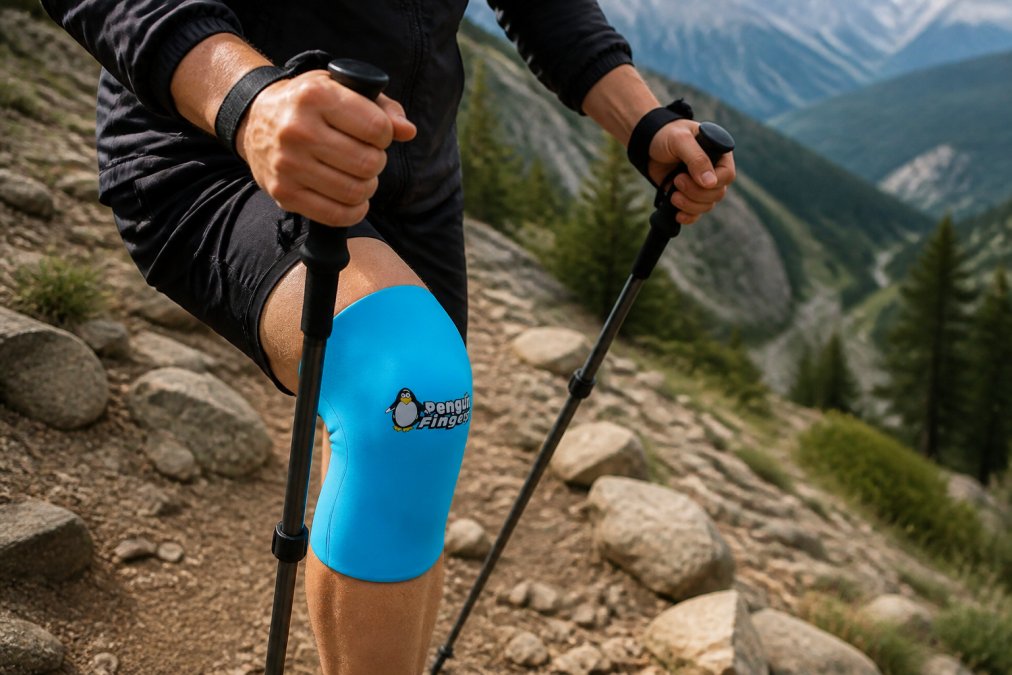
On steep descents, plant poles slightly ahead and let them cushion each step. On switchbacks, keep your downhill pole in front while moving your uphill pole behind to prevent tangles and maintain proper body alignment.
Poles also provide psychological confidence that improves gait mechanics. Confident, smooth steps create far less joint stress than tentative, uneven ones.
How to Treat Tendonitis at Home
If you've developed patellar tendonitis from hiking, the first 48 hours are critical (peer-reviewed research). Immediate intervention prevents inflammation from becoming chronic.
The RICE method, rest, ice, compression, elevation, remains foundational. Rest your knee by avoiding hiking and intense exercise for three to five days. Ice for 15-20 minutes every two to three hours during the first 48 hours to reduce inflammation and numb pain.
Compression is where many people fall short. The Penguin Fingers Knee Cold Compression Therapy Sleeve provides consistent, even pressure across your entire knee joint while delivering therapeutic cold. Wear it for 30 minutes at a time, several times daily. The dual hot and cold capability lets you switch to heat after 48 hours to improve blood flow and support healing.
Elevation reduces swelling by using gravity to drain excess fluid. Spend one to two hours daily with your knee elevated above your heart during the first week.
Gentle range-of-motion exercises begin after 48 hours. Slowly straighten and bend your knee without pushing into pain for five minutes, three times daily. Movement increases blood flow to the injured tendon and prevents stiffness.
Avoid returning to hiking too soon, applying heat during the first 48 hours, or ignoring pain signals. Tendonitis takes three to four weeks of modified activity before serious hiking resumes.
Immediate Relief and Recovery
What you do immediately after descending determines whether you'll experience mild soreness or debilitating knee pain.
Cool down properly before leaving the trailhead by walking flat ground for 10-15 minutes to gradually lower your heart rate and allow muscles to transition to recovery mode.
Apply ice as soon as you get home, even if you feel fine. Proactive icing prevents inflammation before it becomes noticeable. Many hikers skip this and wake with severe stiffness the next morning.
Compression immediately after hiking reduces swelling. The Penguin Fingers Knee Cold Compression Therapy Sleeve provides both cold therapy and compression, addressing inflammation from two angles with consistent pressure far more effective than elastic bandages.
Elevation during recovery is simple but powerful. Spend your evening with legs elevated above your heart, prop feet on pillows while relaxing, you don't need to lie flat.
Hydration and nutrition matter significantly. Drink 16-20 ounces of water within two hours after hiking and consume protein within two hours to support muscle repair and reduce inflammation. Electrolytes help your body retain water.
Gentle stretching the evening after hiking prevents stiffness. Hold each stretch for 30 seconds without bouncing, focusing on quadriceps, hamstrings, calves, and hip flexors.
Sleep is your most powerful recovery tool. During sleep, your body releases growth hormone and increases blood flow to damaged tissues. Aim for eight to nine hours the night after a difficult hike.
When to See a Doctor
Knowing when home treatment isn't enough prevents minor injuries from becoming chronic problems.
See a doctor if pain persists beyond two weeks despite rest, ice, and compression. Sharp, stabbing pain warrants immediate evaluation, as it often indicates mechanical problems like meniscus tears or loose cartilage fragments that don't heal on their own.
Swelling that doesn't improve after three to five days suggests a more serious injury. Instability, sensation that your knee might collapse, indicates ligament damage or severe muscle weakness requiring professional assessment. Recurring pain in the same knee after multiple hikes suggests an underlying weakness or biomechanical problem a physical therapist can address.
Inability to bear weight or severe pain with any movement requires immediate medical attention. Early intervention prevents minor injuries from becoming chronic conditions that limit your hiking for years.
Downhill hiking doesn't have to mean days of knee pain afterward. Prevention through targeted strength training, proper trekking pole technique, and immediate post-hike recovery make a dramatic difference. When pain develops, treating it aggressively in the first 48 hours prevents it from becoming chronic.
The Penguin Fingers Knee Cold Compression Therapy Sleeve is specifically designed for post-hike recovery, providing dual benefits of cold therapy and consistent compression that reduce inflammation and support healing. At $28.95, it's an investment in your ability to keep hiking the trails you love. Get started with Penguin Fingers and get back to the backcountry pain-free.
Frequently Asked Questions
Q: What can I do to relieve knee pain after hiking downhill?
A: Start with the RICE method: rest, ice, compression, and elevation for the first 48 hours. Apply cold compression therapy to reduce inflammation and swelling. Wear a knee compression sleeve like the Penguin Fingers Knee Cold Compression Therapy Sleeve ($28.95) to provide support and pain relief. Gentle stretching and light movement after the first day can help restore mobility. If pain persists beyond a week, consult a healthcare provider.
Q: How long does hiker's knee take to heal?
A: Mild knee pain typically resolves within 1-2 weeks with proper rest and ice therapy. Moderate cases may take 3-4 weeks of consistent treatment and modified activity. Severe injuries or patellar tendonitis can take 6-8 weeks or longer. Recovery depends on the injury severity, your age, and how well you follow preventative measures. Cold compression therapy can support healing by reducing inflammation and improving blood flow to the affected area.
Q: Does trekking pole use reduce knee impact?
A: Yes. Trekking poles reduce impact force on your knees by distributing your body weight across your upper body and arms. They can decrease knee joint stress on downhill sections. Proper technique is essential: plant poles ahead on descents, use them to slow your descent, and maintain an upright posture. This reduces eccentric loading on the quadriceps and patellar tendon, which are primary sources of post-hike knee aching.
Q: What are the symptoms of patellar tendonitis from hiking?
A: Patellar tendonitis causes sharp pain below the kneecap, especially after downhill hiking. You may feel stiffness when climbing stairs, achiness after activity, and swelling around the knee joint. Pain often worsens with repetitive motion and improves with rest. If you experience these symptoms, use cold compression therapy immediately, reduce hiking intensity, and perform eccentric strengthening exercises. Persistent pain lasting more than 2 weeks warrants evaluation by a physical therapist or physician.
This article was written using GrandRanker


