

Table of Contents
- Why Your Wrist Health Depends on Desk Setup
- What You'll Need Before You Start
- Step 1: Set Chair Height for Neutral Shoulder Posture
- Step 2: Adjust Desk Height to Resting Elbow Height
- Step 3: Build Your Ergonomic Keyboard and Mouse Setup
- Step 4: Achieve Proper Wrist Position When Typing
- Your Complete Ergonomic Desk Setup Checklist
- Typing Breaks and Wrist Stretches That Protect Your Joints
- Frequently Asked Questions
Last Updated: October 15, 2026
Why Your Wrist Health Depends on Desk Setup
To set up an ergonomic desk for wrist health, start with one idea: your wrists should stay straight, not bent, while you type.
At Penguin Fingers, we make wearable cold compression wraps for sore wrists and fingers.

Small changes to your desk setup can remove most of that strain. This guide walks you through seven steps to build a wrist-friendly workspace, plus a ten-minute checklist.
OSHA computer workstation ergonomics guidance
What You'll Need Before You Start
You can complete this setup with tools you already own: a tape measure, a few books or a box, and about 20 minutes.
A few items make the job easier:
- A tape measure or ruler
- A stack of books or a sturdy box for raising your screen
- A rolled towel or small cushion for lumbar support
Before you move anything, note two numbers: your resting elbow height while seated and your current desk surface height. Most desk problems come from the gap between them.
Step 1: Set Chair Height for Neutral Shoulder Posture
Start with the chair, not the desk. Chair height decides everything above it.
Sit all the way back so your back touches the backrest.
Now check your shoulders: they should hang loose, not shrug toward your ears.
- Feet flat, knees level with hips
- Back supported by the backrest
- Shoulders relaxed and low
If your feet don't reach the floor after setting the height, add a footrest. Don't lower the chair just to touch the ground.
Step 2: Adjust Desk Height to Resting Elbow Height
The right desk height lets your elbows rest at a 90-degree bend with your shoulders relaxed, the single most important measurement in an ergonomic desk setup.
Here's how to find it:
- Sit in your adjusted chair with your arms hanging at your sides.
- Bend your elbows to about 90 degrees, forearms parallel to the floor.
- Measure from the floor to the bottom of your elbow. That's your resting elbow height.
- Compare it to your desk surface height.
If your desk is too high, raise your chair and add a footrest. If it's too low and fixed-height, place blocks under the desk legs. Adjustable desks make this easy: crank the surface to elbow height.
Step 3: Build Your Ergonomic Keyboard and Mouse Setup
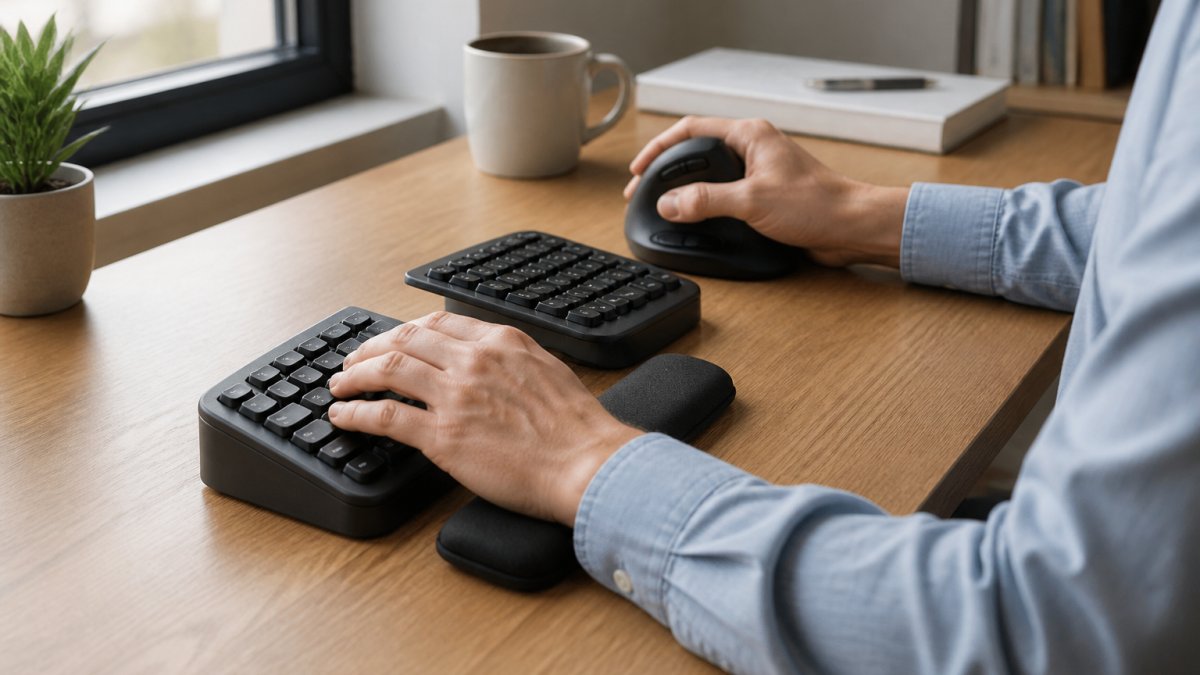
An ergonomic keyboard and mouse setup keeps your hands level with your elbows and close to your body: no reaching, no bending, no hovering. But the device you choose matters as much as where you put it.
Placement first: the measurable checks
Place the keyboard and mouse at the same height, roughly level with your elbows, and keep both close to your body. A common mistake is pushing the keyboard to the back of the desk, forcing your arms to reach forward all day.
Run these three checks before you buy anything new:
- Shoulder check. Sit back in your chair. If your shoulders roll forward or your upper back rounds to reach the keys, the keyboard is too far away. Pull it toward you until your upper arms hang straight down.
- Elbow check. Your elbows should stay within a few inches of your ribs. If they drift outward, the keyboard or mouse is too wide or too far to the side.
- Wrist check. Look at the back of your hand. It should form a straight line with your forearm. If it angles up, the keyboard is too high or tilted up. If it angles down, you are resting your wrists on the desk edge.
Keyboard placement tips:
- Keep the keyboard flat or tilted slightly away from you, never up. Leave the small feet on the back folded.
- Center the keyboard in front of your body. If you use a number pad, consider a tenkeyless or compact layout so the mouse sits closer.
- Keep your elbows close to your ribs.
Mouse placement tips:
- Put the mouse beside the keyboard, within easy reach, you should be able to move it without stretching or leaning.
- Keep your wrist straight, not angled outward. If your wrist twists inward on a standard mouse, test an alternative.
- Move the mouse with your whole arm, not just your wrist. Pivoting at the wrist all day is a common source of strain.
When to test a different keyboard or mouse
If your wrists still bend or twist after you fix placement, the device itself may be the problem.
Vertical mice. A vertical mouse rotates your hand into a handshake position, reducing the inward twist a flat mouse encourages.
Trackballs. A trackball keeps your hand in one place and moves the cursor with your thumb or fingers.
Compact and tenkeyless keyboards. Removing the number pad brings the mouse closer, shortening your reach.
Penguin Fingers Wrist Cold Compression Pack →
Wrist rests: between typing, not during
If your wrists bend backward when you type, a wrist rest can help between bursts of typing. Just don't rest your palms on it while actively typing, that adds pressure and encourages the exact bent position you're trying to avoid.
A common pattern is to buy a wrist rest to fix wrist pain, then press the wrists into it all day. That usually makes things worse. Fix the keyboard height first, then use the rest only during pauses.
Step 4: Achieve Proper Wrist Position When Typing
Proper wrist position when typing means straight wrists, floating hands, and light touches, a straight line with your forearms, not bending up, down, or sideways.
Watch for these two habits:
- Wrist extension: bending your hands backward, usually from a keyboard that's too high.
- Wrist flexion: bending your hands forward, often from resting your wrists on the desk edge.
Both squeeze the wrist and cut circulation over long work hours. The fix is a flat surface and a light touch, let your fingers do the work, not your wrists.
Keep your hands floating just above the keys between keystrokes. It feels odd at first. Give it a week and it becomes normal.
Your Complete Ergonomic Desk Setup Checklist
Run through this ergonomic desk setup checklist every time you change desks, chairs, or devices. It takes about ten minutes, and each row has a measurable target and an observable check so you're not guessing.
| Check | Target | How to Verify | Fix If Off |
|---|---|---|---|
| Chair height | Feet flat, knees level with hips | Thighs roughly parallel to the floor; no pressure under thighs | Add a footrest; do not lower the chair below floor contact |
| Desk height | Level with resting elbow height | Elbows at about 90 degrees, forearms parallel to floor | Raise chair and add footrest, or raise the desk |
| Elbow angle | About 90 degrees | Upper arms hang straight down, elbows near ribs | Adjust desk or chair height |
| Shoulders | Relaxed, not raised | Shoulders drop when you exhale; no shrug | Lower chair or desk |
| Keyboard | Flat, close to body | Back of hand forms a straight line with forearm | Fold keyboard feet; pull keyboard toward you |
| Mouse | Beside keyboard, easy reach | You can move it without leaning or stretching | Pull it closer; consider a compact keyboard |
| Wrists | Straight, floating | No bend up, down, or sideways at rest | Lower keyboard; lighten touch; remove wrist rest during typing |
| Screen top | At or below eye level | Top of screen at or just below your horizontal gaze | Raise with books or a stand |
Troubleshooting by symptom and task
A checklist gets you to neutral. When discomfort shows up anyway, match the symptom to the task.
Discomfort during long sessions. If soreness builds over hours rather than minutes, the setup may be fine but your position is static.
Discomfort that moves around. If the sore spot changes day to day, look at your whole setup rather than one device.
Laptop and small-workspace adaptations
On a laptop, the screen and keyboard are stuck together. A laptop stand plus a separate keyboard and mouse solves it: raise the screen to eye level and drop the keyboard to elbow height.
For small workspaces, the same rules apply in less room:
- Use a compact or tenkeyless keyboard so the mouse sits closer to your body.
- Choose a mouse or trackball that needs less travel across the desk.
- Skip the wrist rest if space is tight, placement matters more.
On a limited budget, prioritize in this order: chair height and footrest, then desk height, then keyboard and mouse placement, then device upgrades. The measurements matter more than the gear.
Ergonomic changes can reduce strain, but they do not guarantee prevention or treatment of a wrist condition. If symptoms persist, worsen, or include numbness, tingling, or weakness, consult a clinician rather than adjusting your desk further.
Typing Breaks and Wrist Stretches That Protect Your Joints
Typing breaks and wrist stretches are the maintenance your setup can't replace. Even a perfect desk gets uncomfortable after hours of nonstop typing.
Take a short break every 30 to 60 minutes. Stand up, roll your shoulders, and let your hands rest. Then run through a few simple stretches:
- Wrist flexion and extension: gently bend your wrist forward, then back.
- Finger stretches: spread your fingers wide, hold, then relax.
- Shoulder rolls: roll your shoulders back slowly, five times.
Keep every stretch gentle. You want a light pull, never pain.
When your wrists still ache after a long day, cold compression can calm the swelling. Our Penguin Fingers Wrist Cold Compression Pack wraps around the wrist and delivers cooling and compression at the same time, in as fast as one to two minutes.
Wrist pain from typing rarely fixes itself, and the longer you ignore a bad setup, the more your joints pay for it. Start with your chair and desk height, then dial in your keyboard and mouse.
Frequently Asked Questions
Should my wrists rest on the desk when typing?
No. Resting your wrists on the desk or a wrist rest while actively typing puts pressure on the carpal tunnel and forces your wrists into extension. Keep your hands floating just above the keys with straight wrists, and only use a wrist rest during pauses between typing bursts. This keeps your wrist alignment neutral and reduces repetitive strain throughout the day.
What is the best wrist position for typing?
The best position is a neutral wrist, meaning your hand, wrist, and forearm form a straight line with no upward (extension) or downward (flexion) bend. Your elbows should sit at roughly a 90-degree bend, and your shoulders should stay relaxed. This neutral hand posture minimizes pressure on tendons and nerves, which is the core goal of any ergonomic keyboard and mouse setup.
How often should I take typing breaks and do wrist stretches?
Take a short break every 20 to 30 minutes of continuous typing. During each break, stand up, roll your shoulders, and do wrist flexion and extension stretches along with gentle finger stretches. Even 30 to 60 seconds of movement restores blood circulation and relieves muscle tension. Set a timer if you tend to lose track of work hours.
What if I already have wrist pain from typing?
Start by fixing your ergonomic desk setup: raise or lower your chair and desk so your elbows rest at about 90 degrees, and keep your keyboard and mouse level with your resting elbow height. For flare-ups, a cold compression pack like the Penguin Fingers Wrist Cold Compression Pack ($16.95) delivers cooling and compression in as fast as 1 to 2 minutes. If pain persists or worsens, see a healthcare provider.


